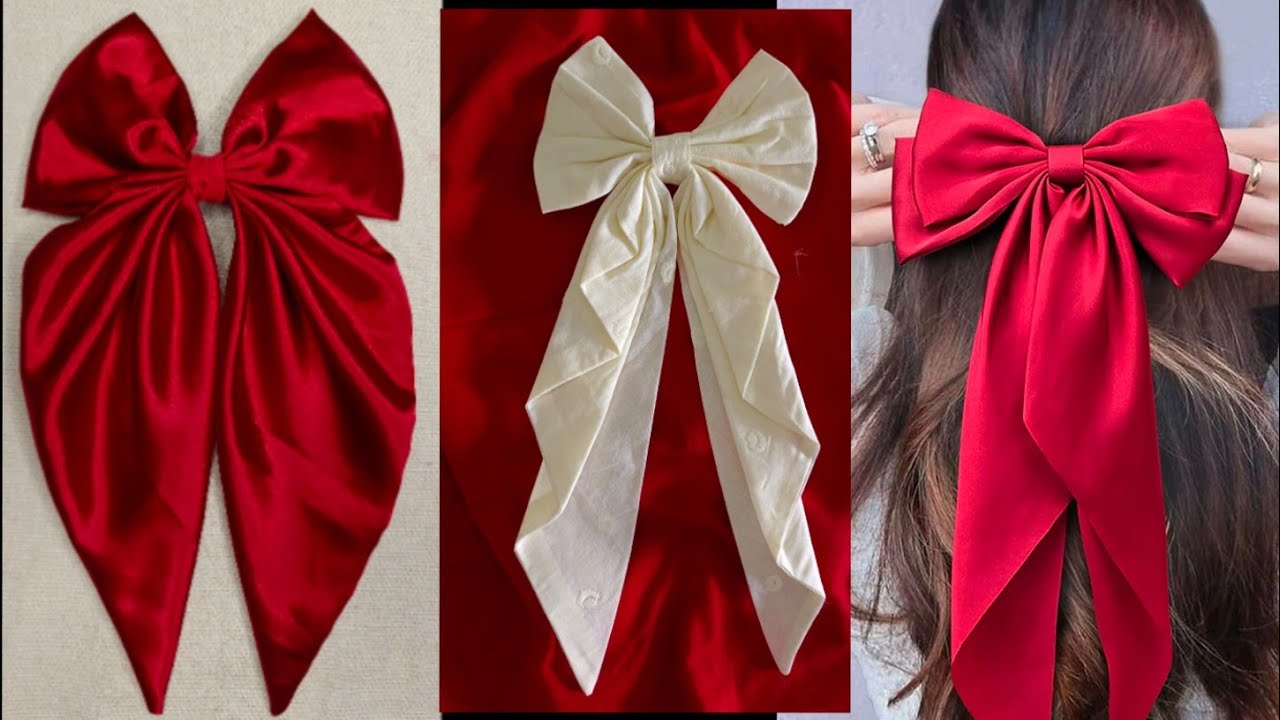
How to Make a Bow with Long Tails
Creating a hair bow with long tails is a fun and simple DIY project that can be customized to suit your style. Below is a detailed, step-by-step guide to making a bow with long tails, using velvet ribbon or any other ribbon of your choice.
Supplies Needed
-
Ribbon: Choose a ribbon of your preference. Velvet ribbon works beautifully for this project. A width of 2.5 inches is ideal, but you can go wider if desired.
-
For the bow itself: Cut one piece of ribbon approximately 40–45 inches long.
-
For the center: Cut another smaller piece about 4.5 inches long.
-
-
Hair Clip: Select a clip type that suits your needs (e.g., alligator clips, combs, or barrettes).
-
Fray Check or Clear Nail Polish: This prevents the edges of the ribbon from fraying.
-
Needle and Thread (or hot glue): Used for assembling and securing the bow.
-
Scissors: For cutting the ribbon and trimming the ends.
Step-by-Step Instructions
Step 1: Prepare Your Ribbon
-
Cut one length of ribbon (40–45 inches) for the main bow and another shorter piece (4.5 inches) for the center.
-
If your ribbon has wire edges, remove them by pulling gently on the wire until it slides out completely.
Step 2: Forming the Bow
-
Fold the longer piece of ribbon in half to find its center point and mark it by finger pressing or lightly creasing it.
-
Lay the ribbon flat on your work surface and overlap both ends toward the center to create two loops resembling a bow shape.
-
Adjust until each loop measures approximately 7 inches wide (or adjust based on your preference).
-
-
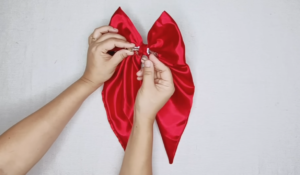
Pinch the center where all layers meet to form pleats, ensuring that it looks neat from the front.
Step 3: Create and Attach the Center
-
Take the smaller piece of ribbon (4.5 inches) and fold its long edges inward by about ½ inch to make it narrower.
-
Secure these folds by stitching or gluing them down along their short ends.
-
-
Wrap this prepared center piece around the pinched middle section of your bow, overlapping its ends at the back side of the bow.
-
Tuck one raw edge under before securing it in place with either stitches or hot glue.
-
Step 4: Secure Your Bow
-
Use a needle and thread to stitch through all layers at the back of your bow’s center piece, ensuring everything stays firmly in place.
-
Alternatively, use hot glue for assembly but ensure you apply glue underneath all layers so nothing shifts over time.
-
Step 5: Attach Hair Clip
-
Position your chosen hair clip at the back of your completed bow where it feels balanced.
-
Stitch around or through parts of the clip using needle and thread to secure it tightly onto your bow’s base.
-
If using hot glue instead, cut out a small circle or rectangle from felt fabric and attach it over both your clip’s base and part of your bow for added stability.
-
Step 6: Trim Long Tails
-
Trim both tail ends diagonally or into “V” shapes for an elegant finish.
-
Apply Fray Check (or clear nail polish) along each cut edge to prevent fraying over time.