How to Make a Snowman Wreath
Creating a snowman wreath is a fun and festive craft project that can add charm to your holiday or winter decor. Below is a detailed, step-by-step guide on how to make a snowman wreath using simple materials, many of which can be found at craft stores like Hobby Lobby, Jo-Ann, or Michaels, or even at your local dollar store.
Supplies Needed
To create a snowman wreath, you will need the following materials:
-
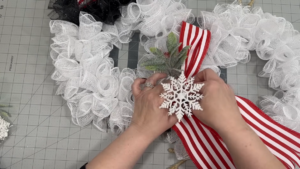
Wreath Forms:
-
Two wreath forms are required: one 12-inch form (for the body) and one 9-inch form (for the head). These can be wood blend wreaths, wire frames, or foam wreaths.
-
These are available at Hobby Lobby, Jo-Ann Fabrics, Michaels, or dollar stores.
-
-
Loop Yarn:
-
Loop yarn is used to wrap around the wreath forms for a soft and fluffy snow-like texture. Brands like Bernat Alize Blanket EZ loop yarn work well; you’ll need approximately 1.5 large balls of yarn or 3 smaller ones.
-
Alternative brands include Lion Brand and Red Heart loop yarns.
-
-
Winter Hat and Scarf:
-
A cozy winter hat and scarf will serve as accessories for your snowman. Choose colors that complement your decor theme.
-
If you prefer traditional snowmen attire but find it challenging to fit a full hat onto the wreath, consider cutting the hat in half for easier placement.
-
-
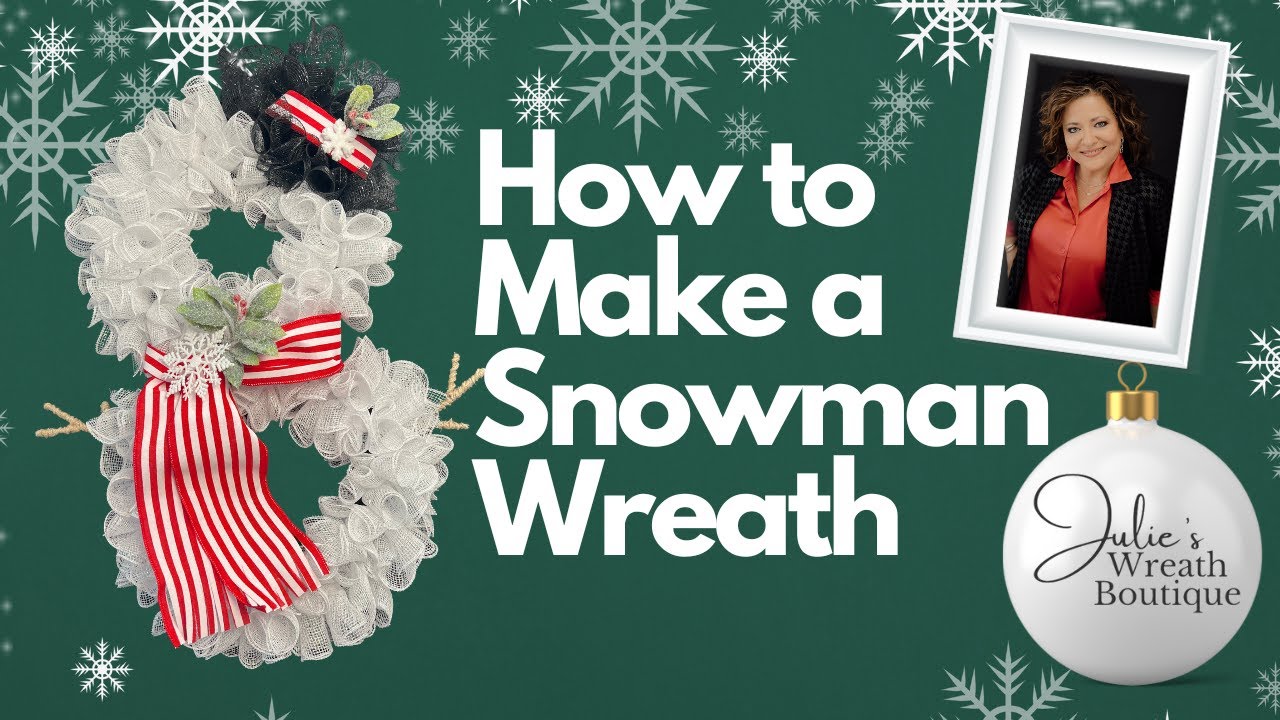
Winter Floral Pick:
- Decorative floral picks with evergreen sprigs, holly leaves, berries, ornaments, or glittery accents can enhance the look of your snowman.
-
Additional Tools:
-
Scissors
-
Hot glue gun (optional)
-
Floral wire or chenille stems
-
Zip ties (optional)
-
Step-by-Step Instructions
Step 1: Wrap the Wreath Forms with Loop Yarn
-
Take one of the wreath forms (start with either size) and tie one end of the loop yarn securely around it.
-
Begin wrapping the yarn around the entire circumference of the wreath form by threading it through its center each time you wrap.
-
Continue until no part of the original frame is visible. Clip off any excess yarn and tie it securely in place.
-
Repeat this process with the second wreath form.
Step 2: Assemble the Snowman Shape
-
Place both wrapped wreath forms together in a figure-eight shape (the smaller one on top for the head).
-
Use additional loop yarn to tie them together securely where they meet. For added stability, you can also use zip ties, floral wire, or white chenille stems.
Step 3: Add Accessories
-
Drape your chosen scarf around where the two wreaths meet to mimic a “neck.” Adjust its length by trimming if necessary; if cut short enough, fringe can be created by snipping strips along its ends.
-
Place the winter hat on top of the smaller wreath (the head). If needed for better placement or security, cut part of the hat so it fits snugly over the frame.
Step 4: Attach Decorative Elements
-
Securely attach your winter floral pick above or below where you’ve placed the scarf using hot glue or floral wire.
-
You may also add other embellishments such as small ornaments for buttons down the body or glittery snowflakes for extra sparkle.
Step 5: Final Touches
-
Ensure all elements are securely attached before hanging your snowman wreath on your door or displaying it indoors on a mantle surrounded by greenery.